After an unprecedented long stall of the release pipeline, Compositor 1.15 is finally here with a big addition: (the beginnings of) a graphical formula editor.
But first of all, sorry to keep you all waiting for so long.
The main reason for the long absence of new releases was that I completely underestimated the amount of work that would go into the formula editor. The LaTeX equation parser alone took me several months, even though I was basically just porting KaTeX’s parser to Swift. Automated testing and quickly iterating on the formula editor UI also presented new challenges.
And to be completely honest with you, another reason for the delay was that I put a lot of time and effort into growing vegetables in my garden in 2020. I found myself enjoying this kind of activity rather a lot!
Ok, here’s a selection of what’s new in this release. As usual, the complete list of fixed bugs and new features can also be found on Github.
Improvements
Formula editor (work in progress) #518
Clicking on a mathematical formula will now show a Formula panel in the inspector. It’s very basic for now, but this is where options for equation numbering and other formatting settings will be added in upcoming releases:
Also note the ^F Open the formula editor entry in the shortcut hints panel at the bottom of the document window.
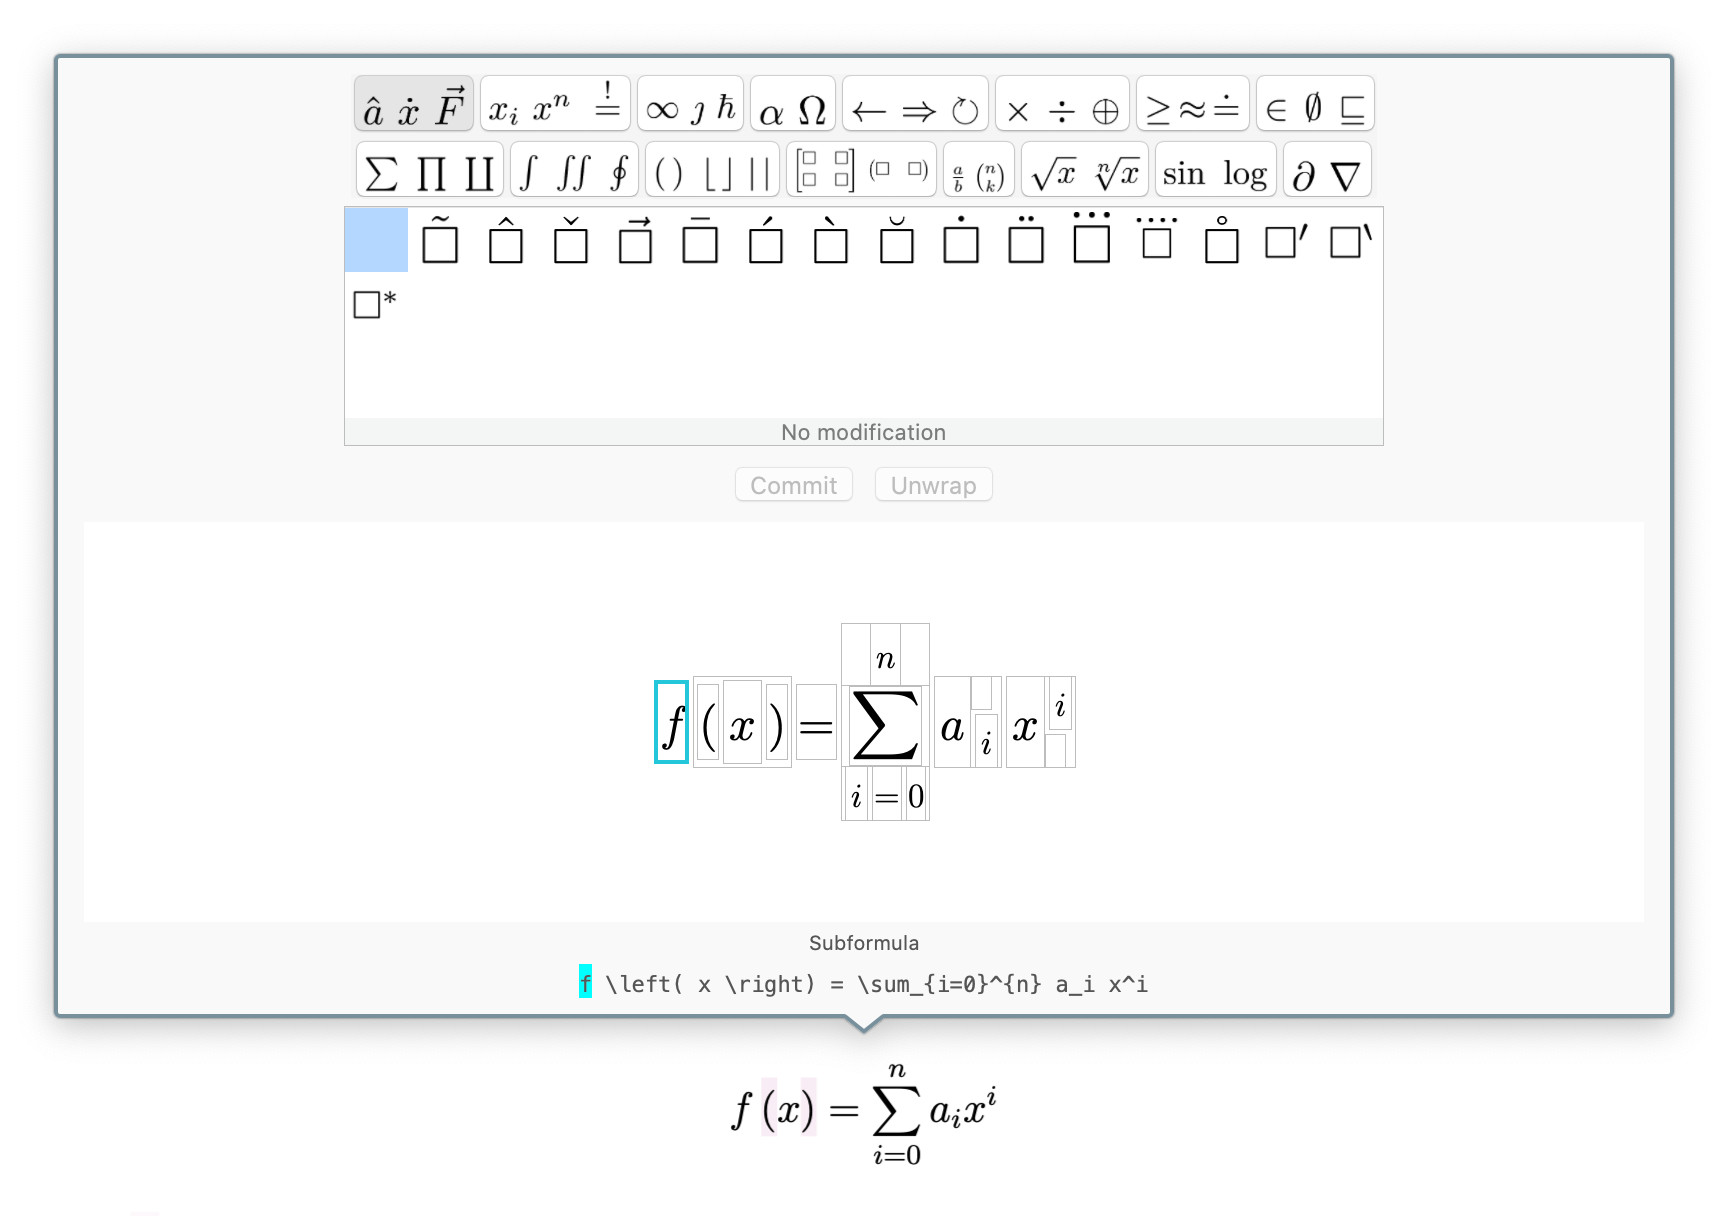
So, with a formula in focus, pressing ^F will open the formula editor. Here’s what it looks like:
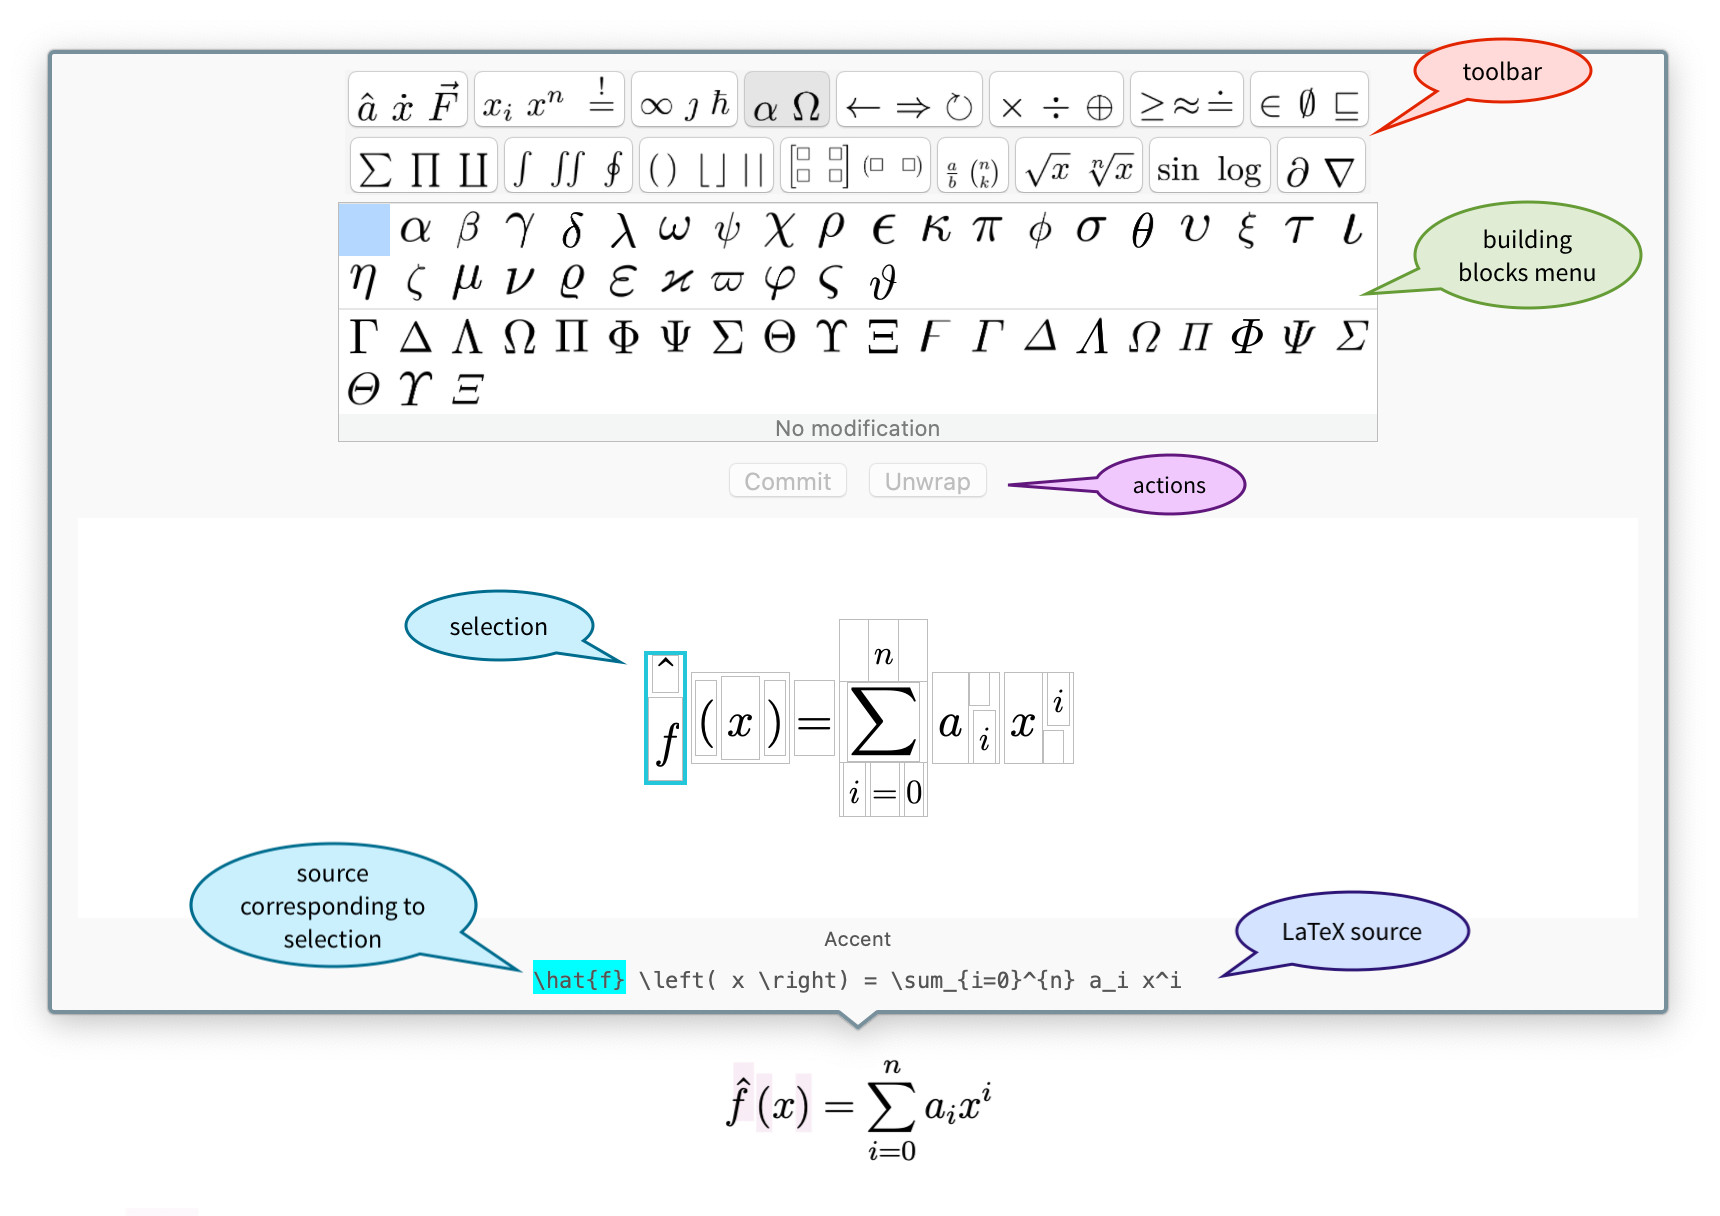
The basic idea is that the formula editor hosts an interactive representation of the formula in the document. Note that formulas can only be edited by means of the formula editor – there is no text caret when clicking on a formula, and no direct text input (because of the structural complexity of formulas).
The odd-looking multitude of gray boxes in the formula representation serve two purposes:
- First, as an indication of the clickable area of elements for mouse selection.
- Second, empty boxes serve as placeholders, e.g., for subscripts or superscripts.
Note that clicking one of the gray boxes will also highlight the corresponding slice of LaTeX source, as exemplified in the picture above.
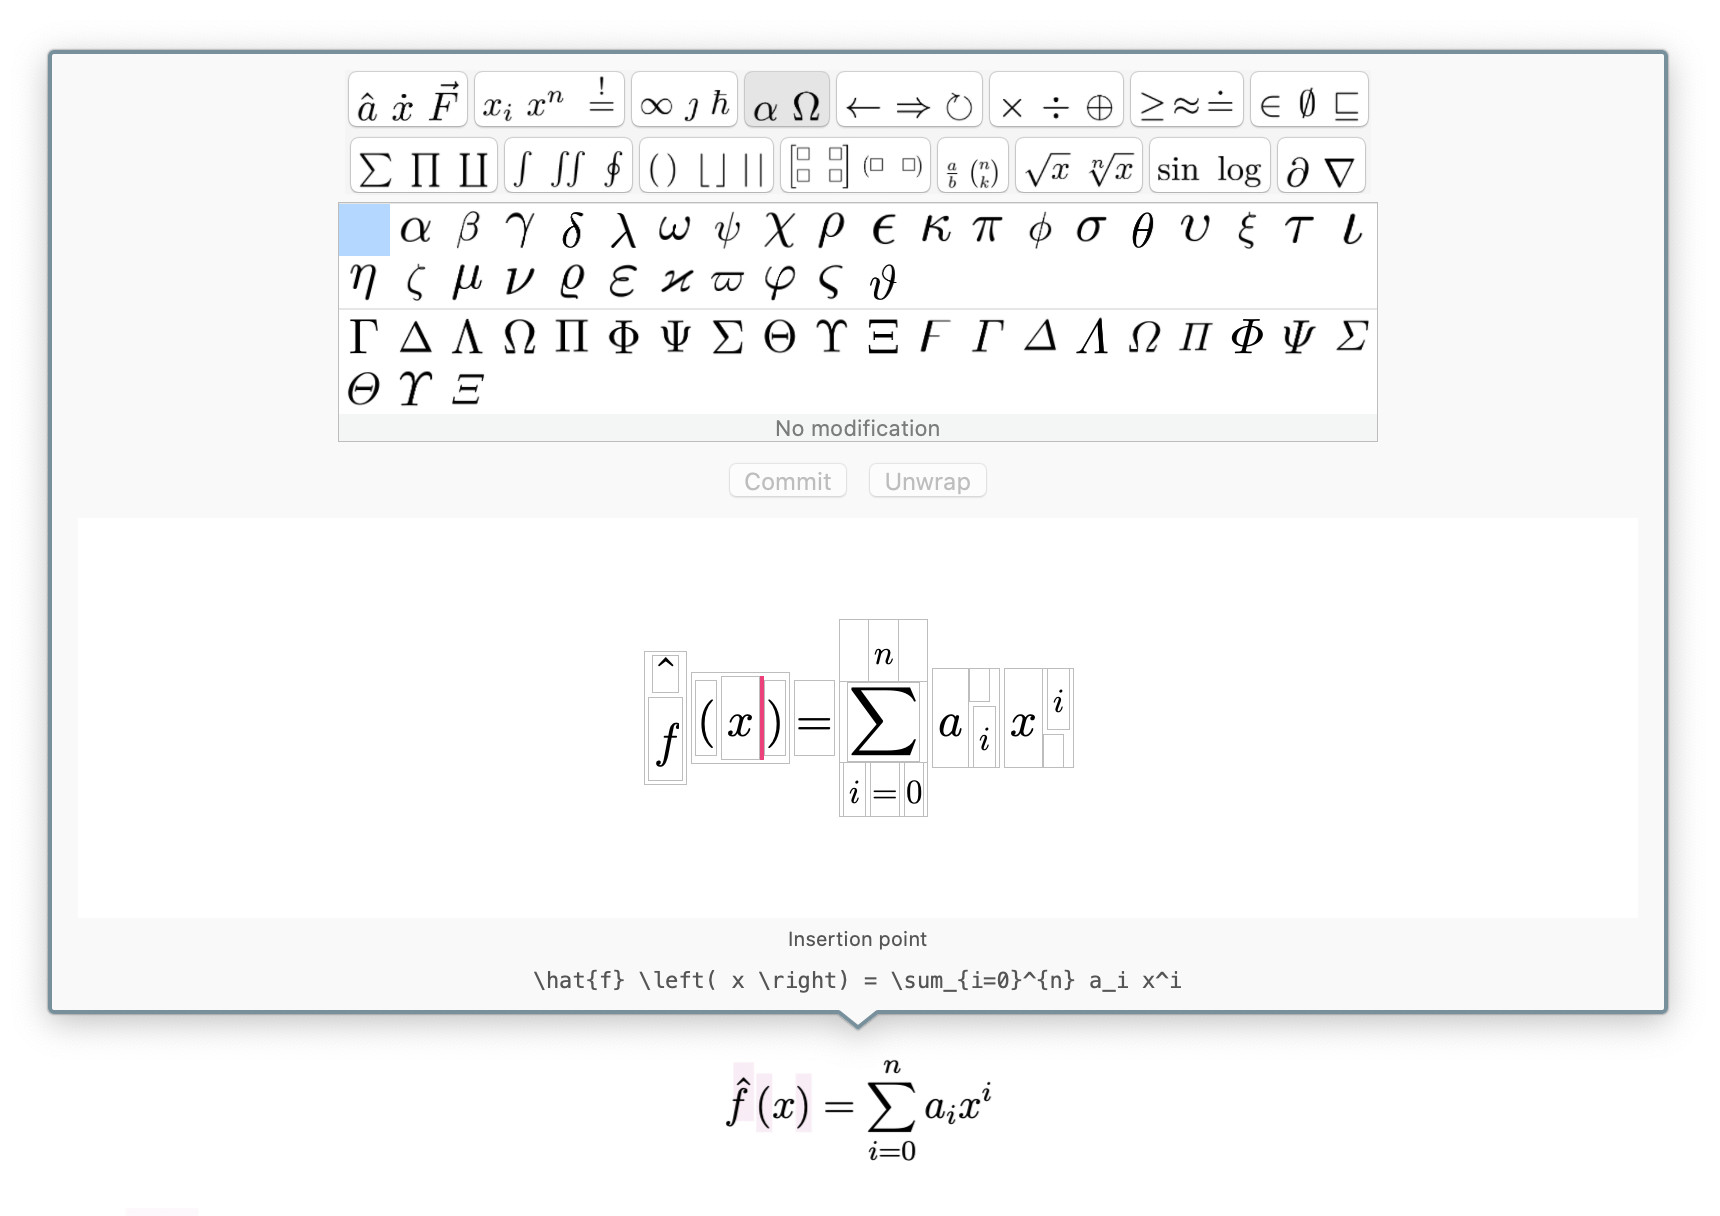
The formula editor of course also supports keyboard navigation, not just mouse selection. To navigate within a formula, use the arrow left / right keys or (equivalently) Tab / Shift+Tab.
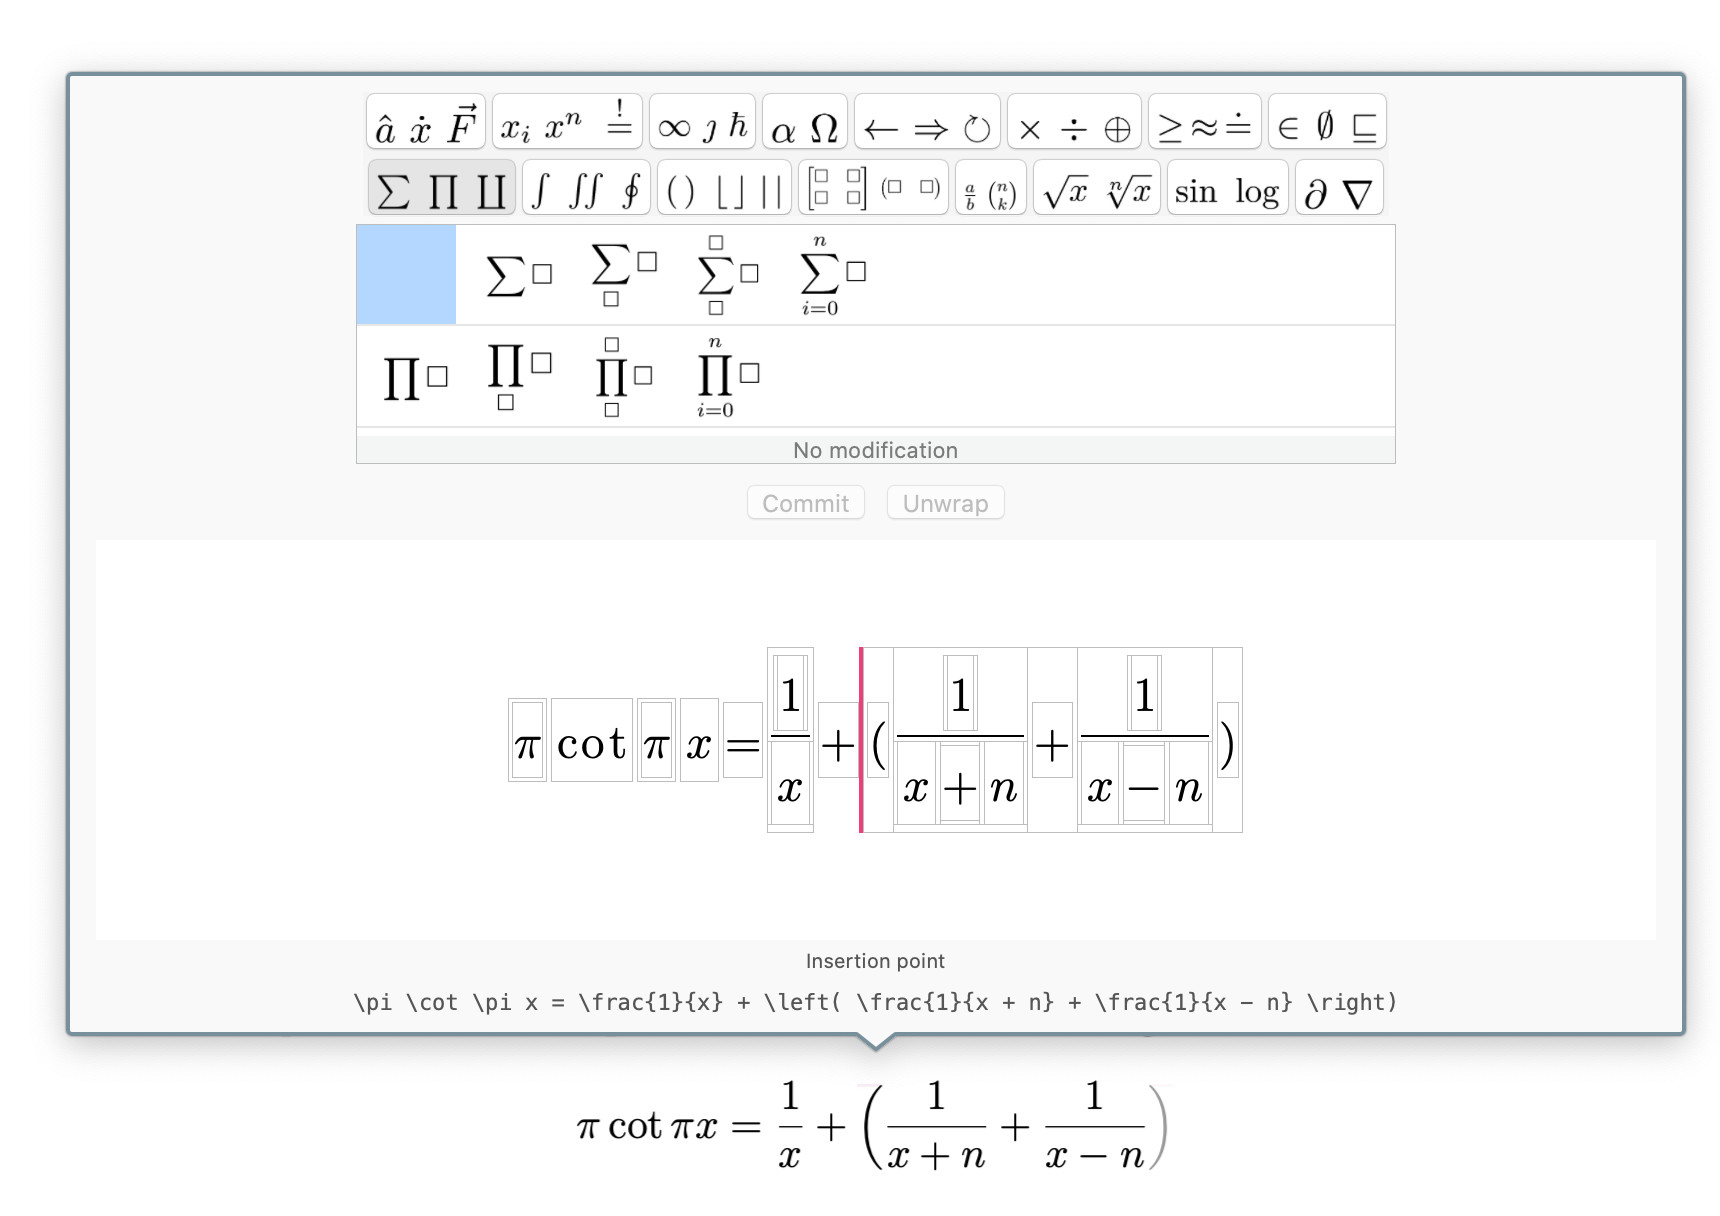
Note that the gray boxes can be nested, sometimes several levels deep. Keyboard navigation is set up in a way so that you can very naturally traverse a hierarchy of boxes. It’s a bit difficult to explain and probably much easier to show an example of keyboard traversal in action. What you see below is navigating through a formula by repeatedly pressing arrow right:

The red vertical bars showing up during keyboard navigation denote insertion points. They are in a way similar to a text caret, but in a more general sense, since you insert entire subformulas at an insertion point.
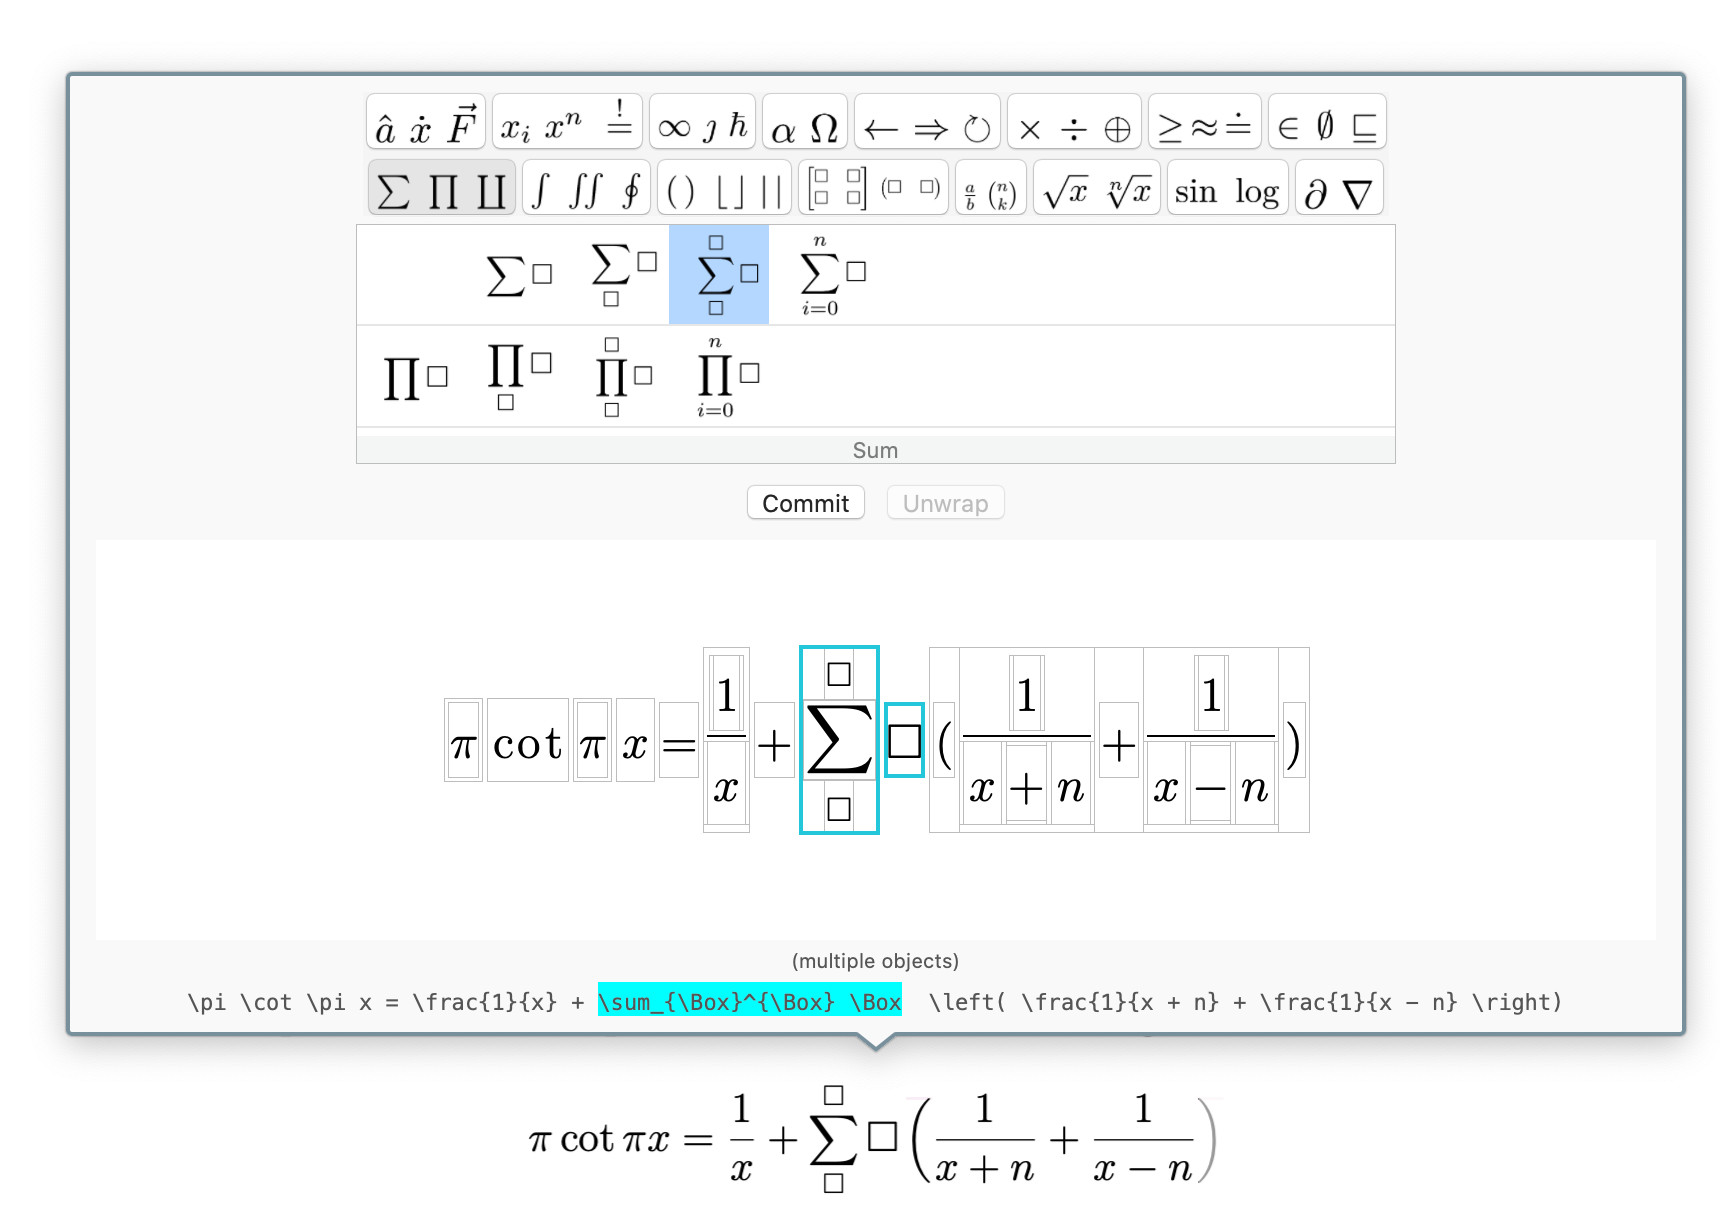
To start simple, let’s insert a greek letter at the location of the insertion point. Click the “Greek Letters” toolbar button to show all greek letters in the building blocks menu:
Next, select the alpha from the building blocks menu:
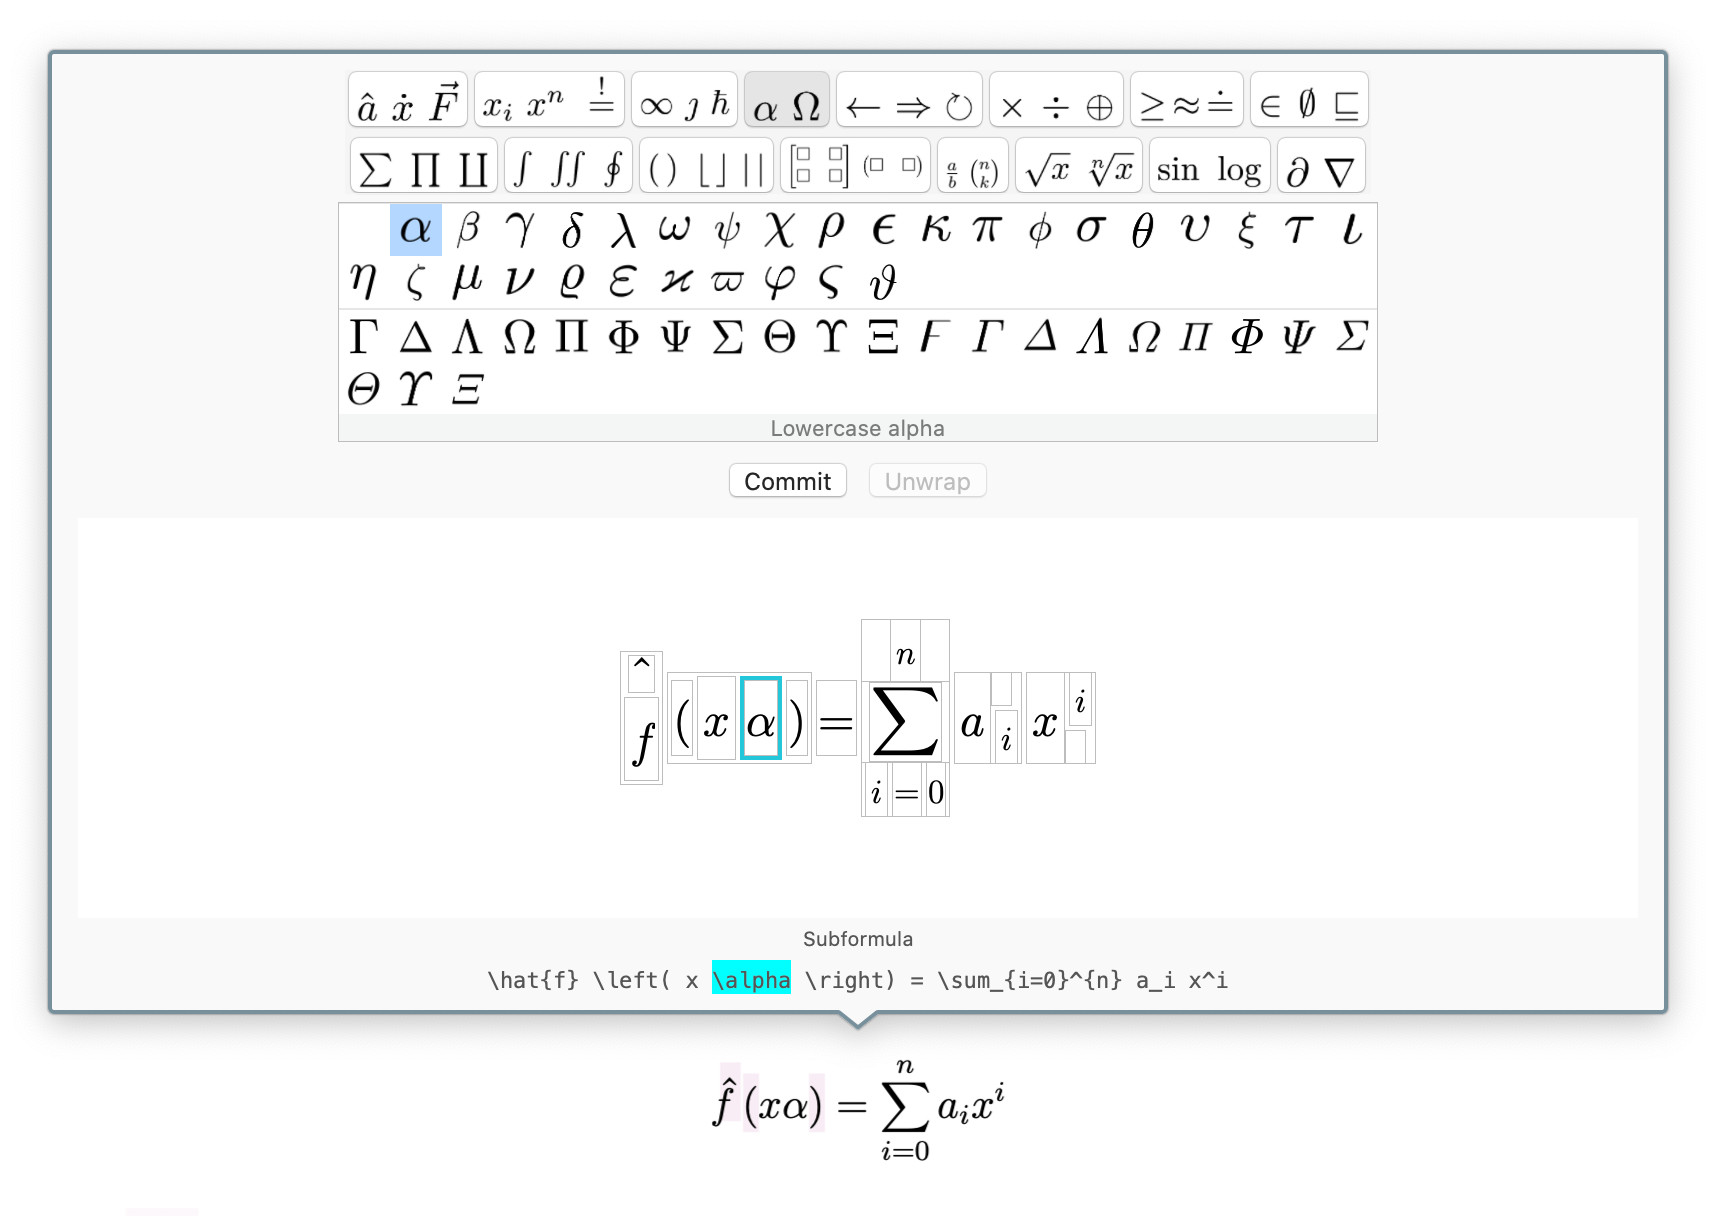
The alpha is inserted and selected in the formula. Picking any other element from the building blocks menu at this stage will replace the alpha:
Notice that the “Commit” button is now enabled, because the current change is still of a temporary nature and can easily be reverted at this stage (see below). To commit your changes and update the document, press the “Commit” button. Alternatively, clicking on any other part of the formula will also commit your changes.
To discard the change of inserting the greek letter, select the first (empty) entry in the building blocks menu:
So this was the most basic example of how to use building blocks. There’s more to it, however, as there are two kinds of building blocks:
- Building blocks that represent standalone symbols of some form: letters, binary operators, arrows, etc.
- Building blocks that take (or “wrap”) one or more arguments: accents, subscripts / superscripts, sums / products / integrals, brackets, matrix-like constructs, fractions, and radicals.
Building blocks that take arguments all have in common that they contain one or more boxes, indicating placeholders for the argument(s):
Pick a building block that suits your need and start filling in the placeholders (the boxes):
So that’s how building blocks with placeholders work.
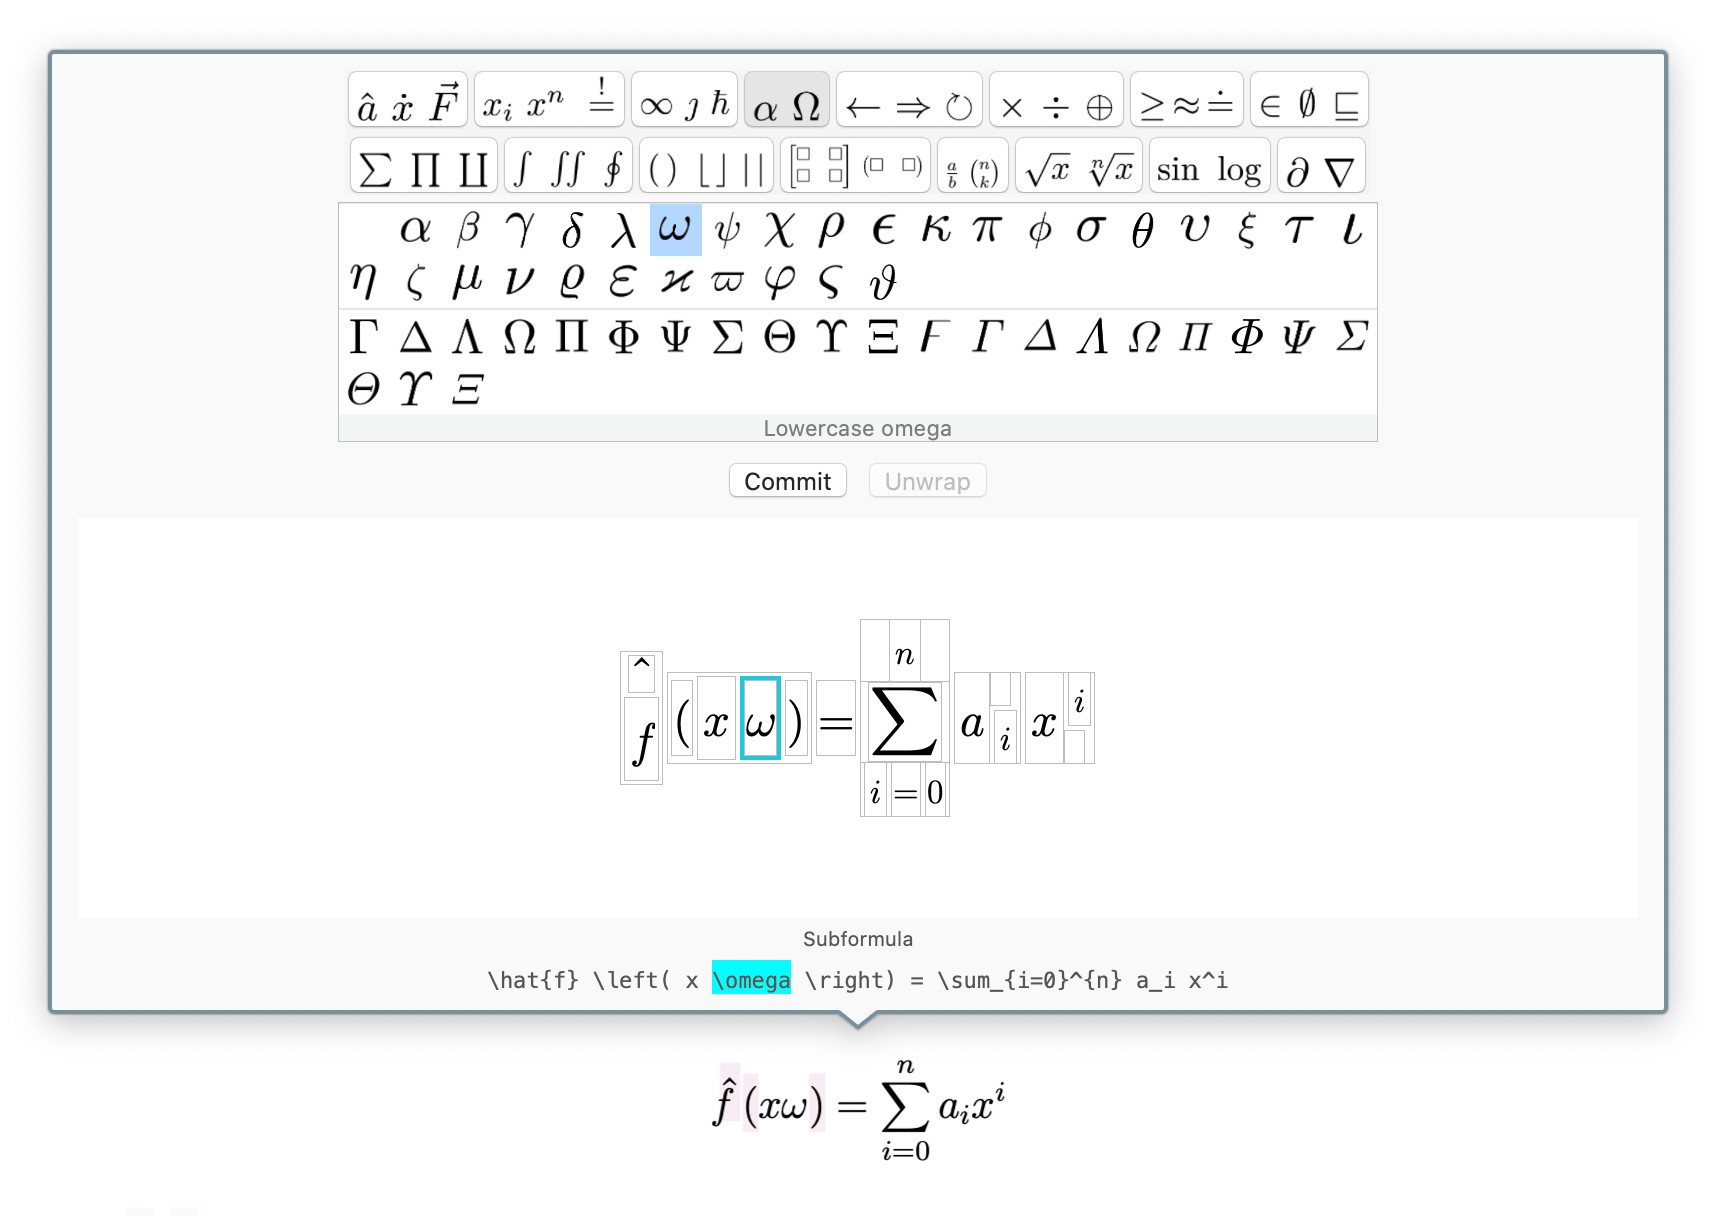
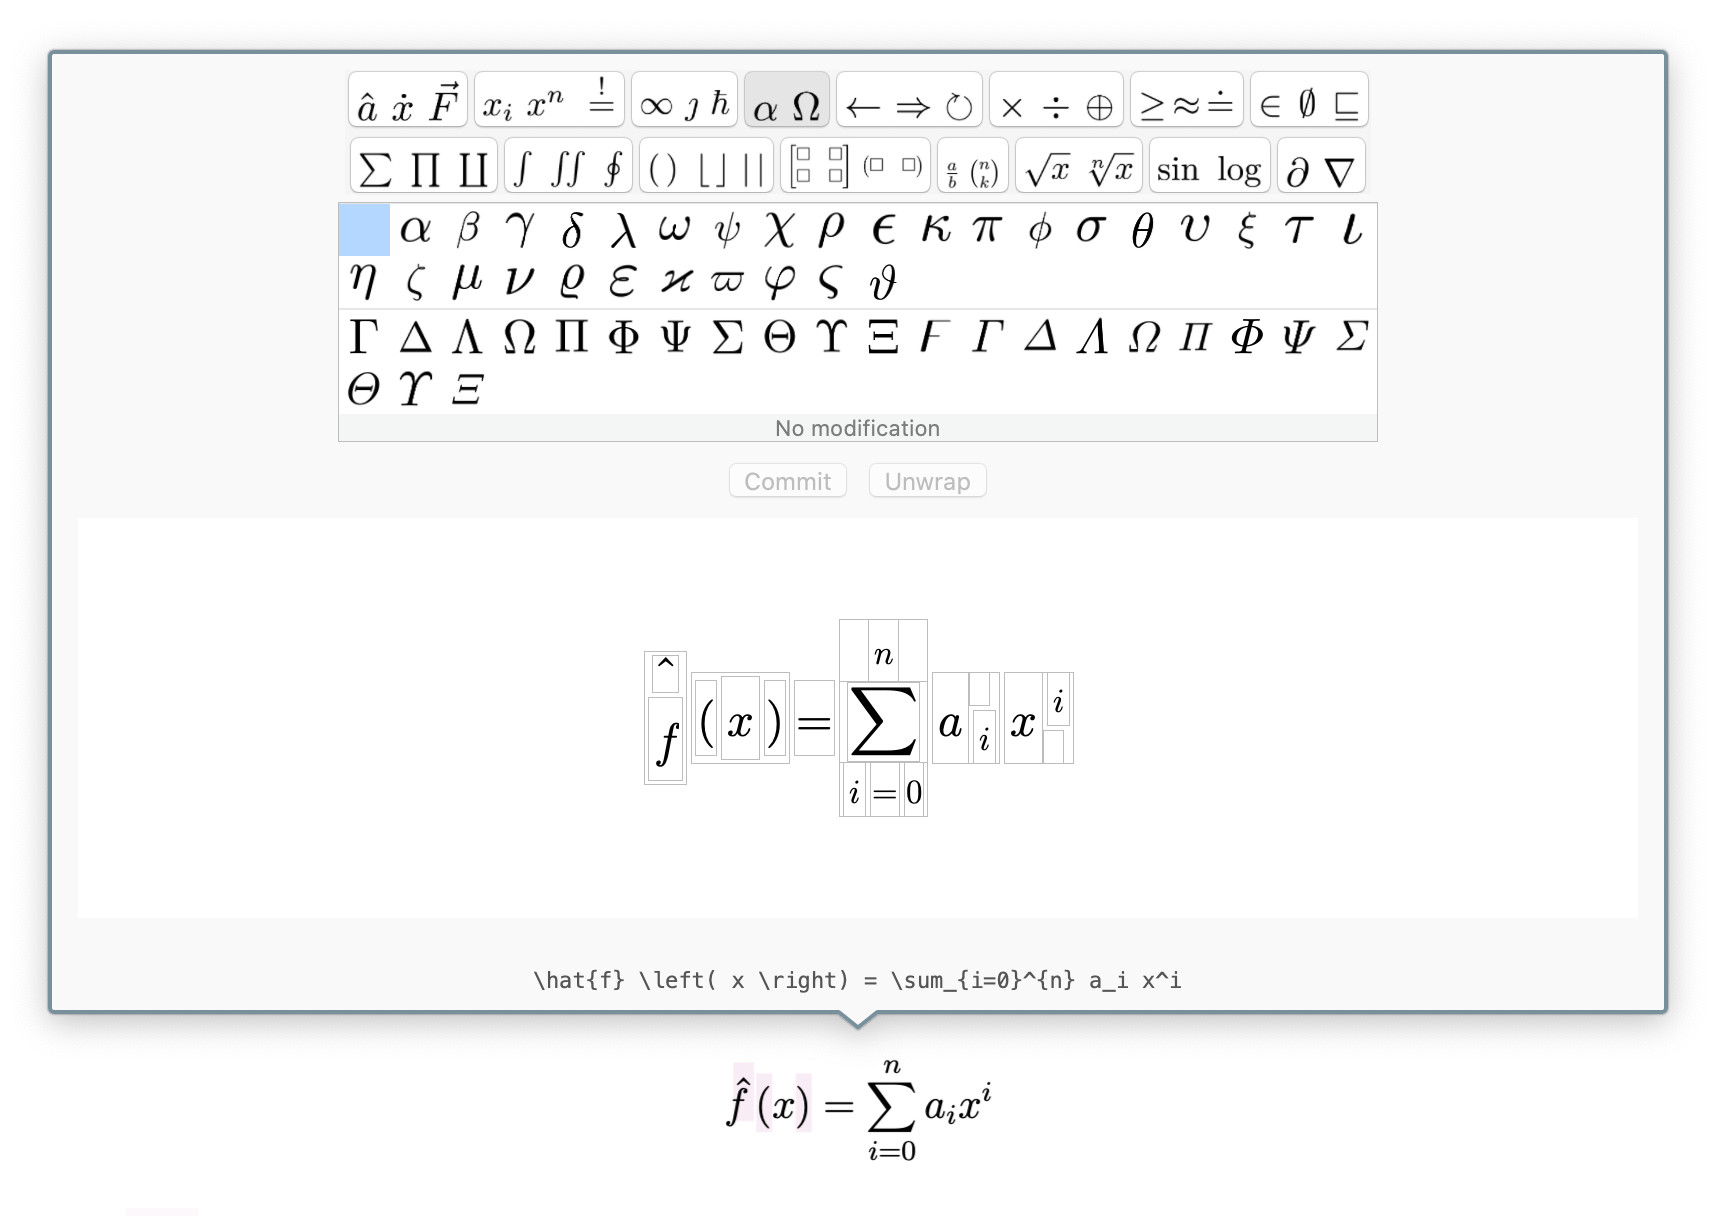
You may have noticed the “Unwrap” button previously. The idea of this button is to “unwrap” an argument
from some enclosing function. Take the \hat{} function in this example:

The \hat{} function literally “wraps” the f. Pressing the “Unwrap” button at this point (with the
f selected) will pull out the argument and discard the wrapper, leaving just the f:
The inverse operation to unwrapping would be wrapping the f in a \hat{} function. To do so,
select the f and pick the “Hat” building block from the “Accents” menu:

To delete a formula element, select it and simply press the Delete button on the keyboard.
Finally, to insert a new formula into a document in the first place, place the text caret where you would like to insert it:
and choose Inline Formula or Displayed Formula from the Insert menu:
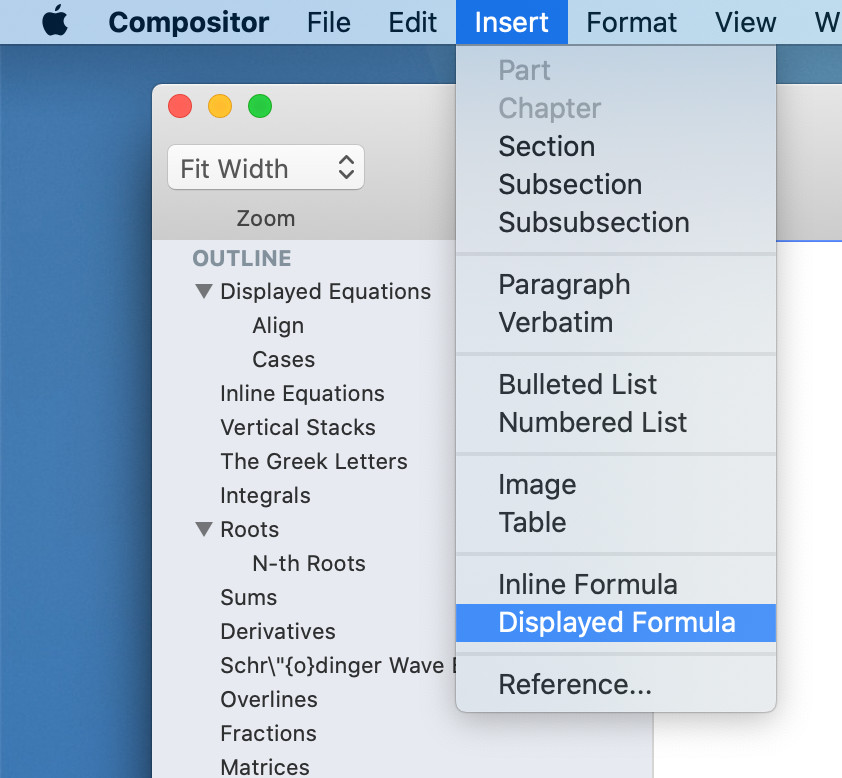
A placeholder formula (at the moment, a lonely “x”) will be inserted which you can then select and edit as described above.
I would like to stress at this point that the formula is still very much work in progress. I released it in this early form because I have been working on this for over a year now and I felt increasingly uncomfortable with not posting any updates. Feedback is of course welcome as always.
Bugfixes
- Fonts messed up during incremental typesetting #528
- Incorrect glyph mappings for some AMS symbols #529
Next Up
After this long hiatus, I want to get back into a steady rhythm of releases about every 6-8 weeks.
A rough scope for the next release is already planned: Release 1.16