In Compositor releases 1.4 and 1.5, a couple of severe regressions slipped into the shipping product. The app was embarrassingly unusable, and it was clear that I had to do more in the way of testing.
I had a suite of unit and integration tests in place right from day one, but up to now I had skipped on the effort of setting up automated, high-level, functional tests. (I will refer to these tests as UI tests, because they are mainly driven through the user interface.)
In the past few days, I finally added this missing layer of automated testing to the Compositor release process, and in this post I would like to describe how that works.
Compositor now has a standard testing pyramid of unit, integration, and UI tests, with about 220 unit tests, 50 integration tests, and 5 UI tests written as part of a UI testing proof-of-concept. I’m aiming for around 20 UI tests in the near term to cover the core functionality of the app.
In the mid term, my goal is to build a high fidelity, automated suite of UI tests that lets me release, with high confidence, a new version of the app with little to no manual testing. A release should be ready to go if all automated tests are green.
Let’s look at each layer of the testing pyramid, starting at the bottom with
Unit Tests
A unit test tests a single unit of functionality (e.g., class, struct, free function). As soon as a second (non-mocked) component comes into play, you usually refer to the test as an integration test instead (but in practice this rule doesn’t always hold, see below).
Unit tests should be small, easy to write (and easy to read, too!), fast to execute, and relatively easy to maintain (if the code is well-factored).
When it comes to deciding whether a piece of code should be unit tested, my rule of thumb is:
- If the code contains any tricky bits (i.e., conditionals, loops), it should be unit tested.
- On the other hand, trivial code (e.g., getters) and code that is obviously correct at first glance should not be unit tested.
Always keep in mind that tests have not just a benefit, but also a cost associated with them, in the form of test maintenance effort when things change. A large test suite for ill-factored code can become a liability and can slow you down. So, don’t write tests for everything. But you definitely want to have your core functionality covered.
Let’s look at some examples.
Unit Test Example: ScopeParser
ScopeParser is one of Compositor’s core classes. A ScopeParser parses LaTeX source code
for scopes. A scope is either a LaTeX command, a LaTeX environment, or a paragraph
of text. Whenever a user clicks somewhere in a Compositor document, the click will
most often hit a scope, and the inspector panel will display information about that scope.
So the ScopeParser type is of fundamental importance to the app, and thus covered with
unit tests. Here’s one of them:
func testParseCommandWithOneArgument() {
    let string: NSString = "\\section{Introduction}"
    guard let scope = parser.parse(string, at: 12) else {
        return XCTFail()
    }
    guard case .command(let cmd) = scope.kind else {
        return XCTFail()
    }
    XCTAssertEqual(cmd, "section")
    XCTAssertEqual(scope.content, "\\section{Introduction}")
    guard let arguments = scope.arguments else {
        return XCTFail()
    }
    XCTAssertEqual(arguments, ["Introduction"])
    XCTAssertNil(scope.optionsRange)
}
Here’s another ScopeParser test:
func testParseOptions() {
    let source: NSString = "\\textbf[opt0]{he|llo}"
    let markerLocation = source.range(of: "|").location
    guard let scope = parser.parse(source, at: markerLocation) else {
        return XCTFail()
    }
    guard let options = scope.parseOptions() else {
        return XCTFail()
    }
    XCTAssertEqual(options.first?.value, "opt0")
}
Quite a few things going on in these simple examples already, but they should be easy to read and understand, I think.
Unit Test Example: SourceModel
Another core class in Compositor is the SourceModel class. It represents the
source code of a LaTeX document. Any changes Compositor makes to the document source code
are applied through SourceModel.
Here’s the most basic test for this type. It inserts a piece of text:
func testInsertText() {
    let sourceModel = SourceModel()
    sourceModel.load(source: "Abc")
    sourceModel.select(NSRange(location: 1, length: 0))
    sourceModel.insertText("test")
    XCTAssertEqual(sourceModel.texSource, "Atestbc")
    XCTAssertEqual(sourceModel.selection, NSRange(location: 5, length: 0))
    guard let scope = sourceModel.scope else {
        return XCTFail()
    }
    XCTAssertTrue(scope.kind == Scope.Kind.paragraph)
    XCTAssertEqual(scope.range, NSRange(location: 0, length: 7))
    XCTAssertEqual(scope.content, "Atestbc")
}
This looks almost trivial, but SourceModel is a large class that does nifty things
like source canonicalization, so a lot can go wrong internally even in seemingly
innocent scenarios like this.
Here’s a slightly more advanced one. This test verifies that a new paragraph is inserted when you press Enter while the caret is inside a section title:
func testInsertParagraphAfterSectionTitle() {
    let source =
        "\\section{Sec|tion}\n\n" +
    "The first paragraph."
    let expectedSource = NSString(string:
        "\\section{Sec|tion}\n\n" +
            "Paragraph\n\n" +
        "The first paragraph.")
    let sourceModel = SourceModel()
    sourceModel.load(source: source)
    let markerLocation = sourceModel.texSource.range(of: "|").location
    let selectionRange = NSRange(location: markerLocation + 1, length: 0)
    sourceModel.select(selectionRange)
    sourceModel.insertNewline()
    XCTAssertEqual(sourceModel.texSource, expectedSource)
}
And there are a lot more of these, because this class does all kinds of source manipulation.
Actually, SourceModel makes use of a ScopeParser, so technically this is already
an integration test, but I keep the SourceModel tests in the Unit Tests group.
A Note about Test Target Setup
I prefer to set up my unit and integration test targets such that they include all the source files required for the tests to compile (and conversely, no source files that are not required) in the “Compile Sources” build phase:
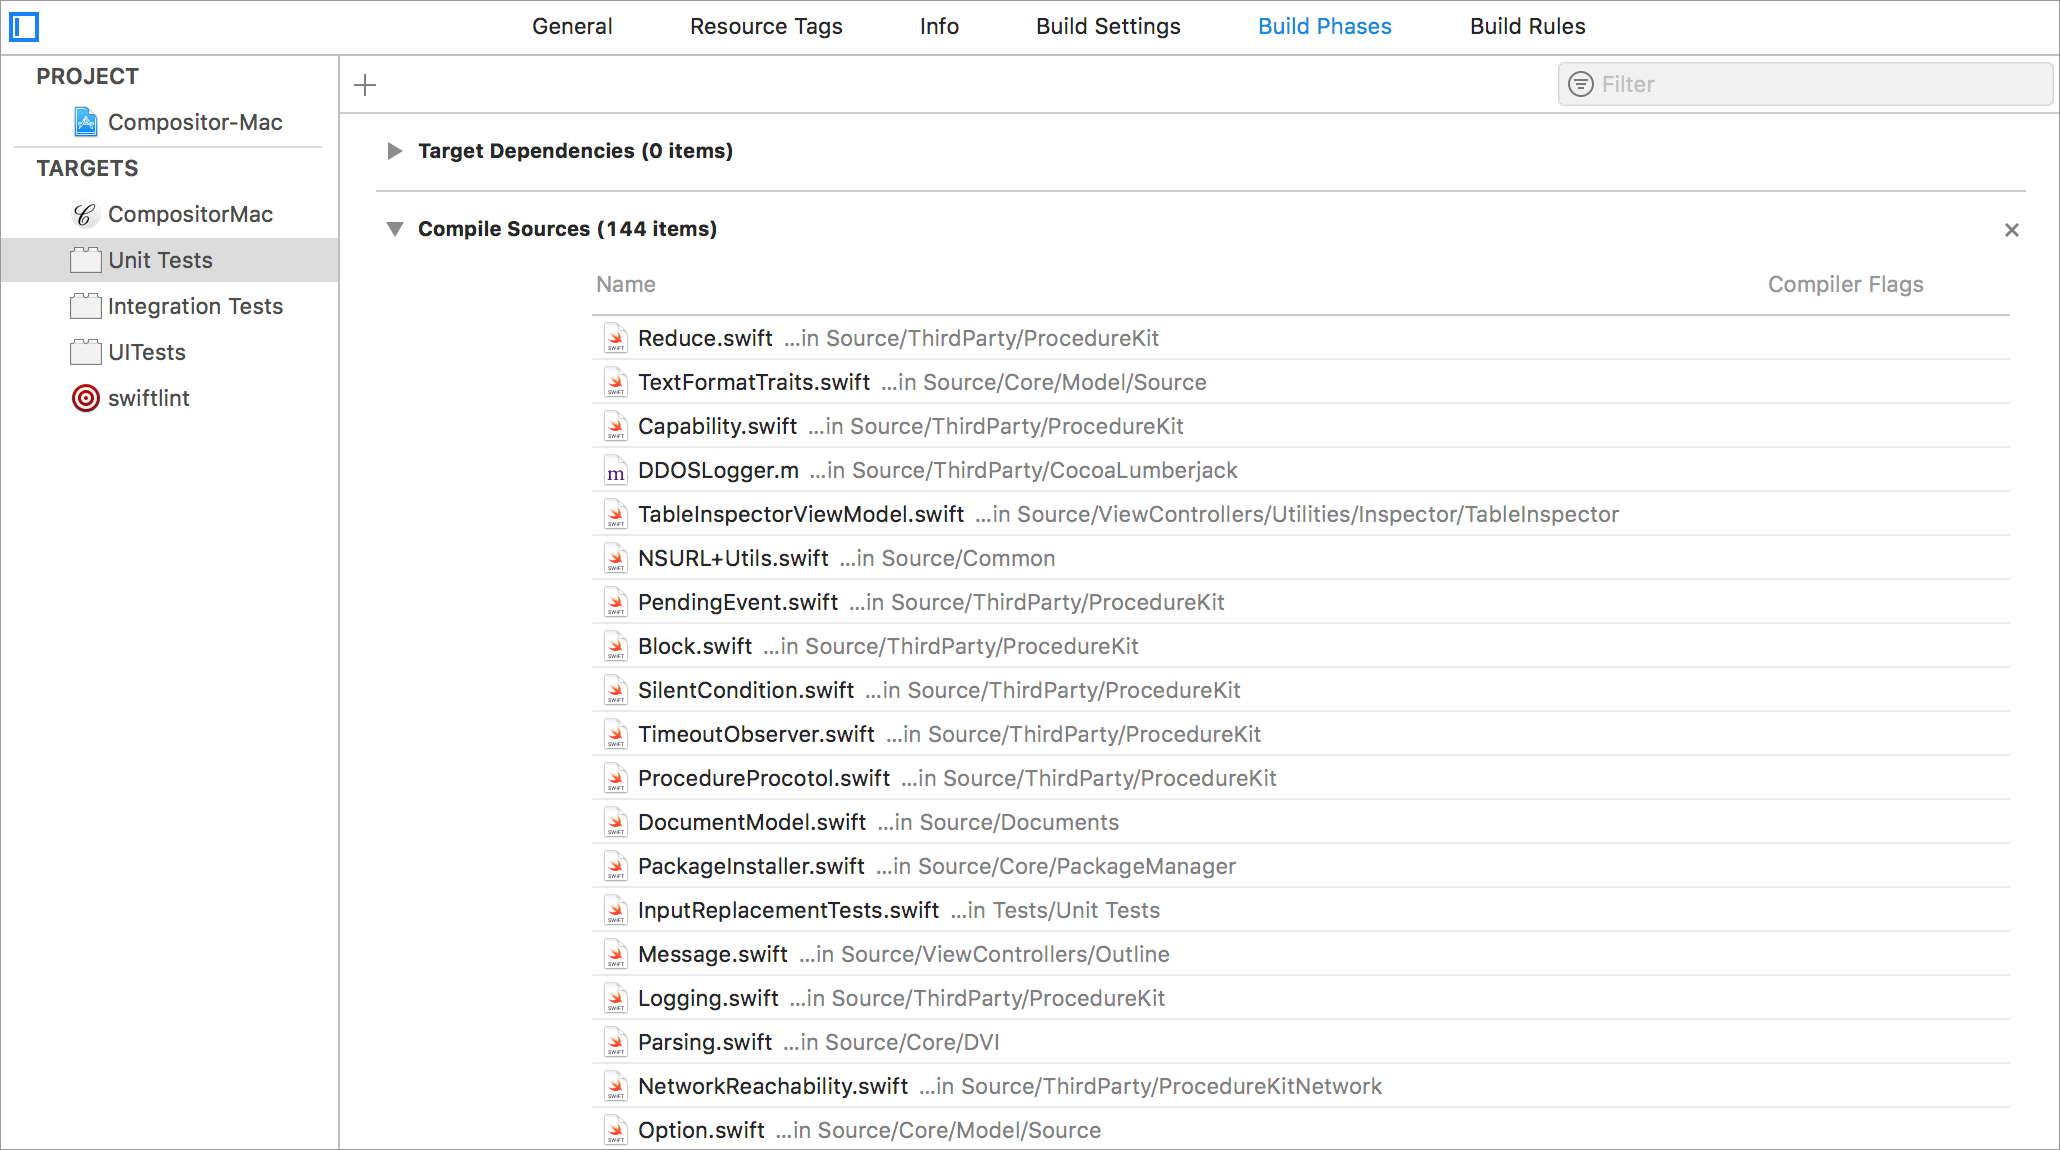
This way, only code that’s actually needed for the tests gets compiled.
Also, and much more importantly, this serves as a check for spotting unwanted dependencies. When unit tests for core classes suddenly require UI files to make the compiler happy, you know there’s an undesirable dependency from core code to UI code.
This means your unit test target should not contain any UI code, only “core” code. If you want to test, say, view models that require UI code, you may want to consider setting up a dedicated target for that.
XCTest Packaging and Execution
Now, what happens when you actually run the unit tests?
Xcode compiles and packages the unit tests into a loadable bundle of extension .xctest
(e.g, Unit Tests.xctest). We can tell it’s a loadable bundle by printing out the Mach header information
of the bundle’s binary:
$  otool -h -v Unit\ Tests.xctest/Contents/MacOS/Unit\ Tests
Mach header
      magic cputype cpusubtype  caps    filetype ncmds sizeofcmds      flags
MH_MAGIC_64  X86_64        ALL  0x00      BUNDLE    40       5432   NOUNDEFS DYLDLINK TWOLEVEL WEAK_DEFINES BINDS_TO_WEAK
The filetype BUNDLE identifies a loadable bundle. The other possible types of bundles are applications
(filetype EXECUTE), and frameworks (filetype DYLIB).
As the name suggests, loadable bundles contain code that can be loaded at runtime. You can create plug-in architectures around that:
A plug-in is a bundle that adds functionality to an application, called the host application.
So if the unit test bundle is the plug-in, what’s the host application?
In the case of a unit test, it’s the xctest executable, which can be found at
/Applications/Xcode.app/Contents/Developer/Platforms/MacOSX.platform/Developer/Library/Xcode/Agents/xctest
To run the unit tests, call xctest and pass the path to the test bundle:
$ ./xctest ~/Library/Developer/Xcode/DerivedData/Compositor-algvalfbyknlpvfwesfctugovthq/Build/Products/Debug/Unit\ Tests.xctest/
Test Suite 'All tests' started at 2018-09-23 14:13:03.223
Test Suite 'Unit Tests.xctest' started at 2018-09-23 14:13:03.223
Test Suite 'BracingTests' started at 2018-09-23 14:13:03.223
Test Case '-[Unit_Tests.BracingTests testCommandOptions]' started.
Test Case '-[Unit_Tests.BracingTests testCommandOptions]' passed (0.131 seconds).
Test Case '-[Unit_Tests.BracingTests testInlineMathBracketDelimiter]' started.
Test Case '-[Unit_Tests.BracingTests testInlineMathBracketDelimiter]' passed (0.000 seconds).
Test Case '-[Unit_Tests.BracingTests testInlineMathParenthesesDelimiter]' started.
Test Case '-[Unit_Tests.BracingTests testInlineMathParenthesesDelimiter]' passed (0.000 seconds).
Test Case '-[Unit_Tests.BracingTests testNestedClosingBrace]' started.
Test Case '-[Unit_Tests.BracingTests testNestedClosingBrace]' passed (0.000 seconds).
(and so on)
Of course, you usually let Xcode do this for you, but I wanted to explain how the tests are executed by a host application, because we will build on that knowledge further down.
I also wrote a very simple XCTest test runner that demonstrates how to load and run the tests contained in such a loadable bundle. The code is available on github.
Now let’s quickly look at
Integration Tests
Integration tests test the interactions between several building blocks.
Usually, the individual building blocks will be covered by unit tests to some degree. Experience shows that a system built from well-tested bits and pieces will likely be more robust already, but there’s always a certain amount of glue code required to bring the bits together. It is this glue code (which is often not directly testable, otherwise we could write unit tests for it) and the side-effects stemming from it that we want to test with integration tests.
Integration tests can be very little effort to write and maintain if the building blocks are well-factored (i.e. have clean interfaces and no unwanted dependencies).
I have become quite fond of integration tests recently, not just because they are useful in the testing aspect, they also perform an architectural audit on your code. If writing integration tests is little effort, the interfaces of your types are probably in good shape.
Let’s see an example of an integration test in Compositor. Below is one of many
tests for the DVITextView class, which is the main user interface
class for interacting with DVI
documents. A DVITextView can render a single
page of DVI output, handles mouse and keyboard interaction, and hooks into the macOS text
framework by implementing the NSTextInputClient protocol, forwarding text input
to a SourceModel.
The following test tests a single mouse click in the left half of a glyph (character) in the DVI.
The expected outcome is that the DVITextView is in edit mode after the mouse click and
shows a blinking caret left to that character:
// MARK: - Mouse Selection

// (1328)Over (1333)the (1337)past (1342)ten (1346)years...

// * click location
// -> drag direction
// | caret location
// [A] selection covering A

// MARK: Click

// |*Ov
func test_single_lefthit_click() {
    guard let page = dviDoc.pages.first else {
        return
    }
    guard let O = page.char(atSourcePosition: 1328) else {
        return
    }
    let click = Event(locationInWindow: textView.convertToLocationInWindow(O.leftHit), clickCount: 1)
    textView.mouseDown(with: click)
    textView.mouseUp(with: click)
    XCTAssert(textView.isEditing)
    XCTAssert(textView.caretBlinking)
    guard let selection = textView.selection else {
        return XCTFail()
    }
    XCTAssert(selection.from == O)
    XCTAssert(selection.to == O)
    XCTAssert(selection.isEmpty)
    XCTAssertEqual(selection.sourceRange, NSRange(location: O.sourcePosition, length: 0))
}
This test covers a fundamental interaction between the main user interface class and the user. There’s a ton of stuff going on in this tiny test, and a lot can go wrong here, so this test brings a lot of value at very little cost.
Here’s one even larger test, testing the DocumentModel. The DocumentModel ties all the
main core components together: the SourceModel (the input to TeX),
the actual TeX typesetting engine, DVI parsing (the output of TeX), an OutlineParser
that provides the document structure to the document outline view, a Distro for providing LaTeX packages,
as well as a PackageManager for downloading any missing packages.
So this is almost the entire core functionality of the app that’s exercised in this integration test, yet there’s surprisingly little code involved:
import XCTest

class DocumentModelTests: IntegrationTest {

    func testBasicTypesetting() {
        let distro = Distro()
        let packageManager = PackageManager(distro: distro)

        let basename = "test"
        guard let (documentUrl, source) = loadSampleSource(basename) else {
            return XCTFail()
        }

        let model = DocumentModel(documentName: basename, documentUrl: documentUrl, distro: distro, packageManager: packageManager)
        model.load(source: source)
        let exp = expectation(description: "typesetting")
        model.typeset {
            exp.fulfill()
        }
        sleep(1)    // give async dump writing time to finish
        waitForExpectations(timeout: 10)
    }
The test should probably have more asserts other than just expecting typesetting to finish in time, but
the point is that this automated test works all core components of the app with very little effort.
And we don’t need to go through hoops (in terms of mocking) in order to drive this scenario by
an XCTest that’s convenient to run and debug.
As for the packaging and execution of integration tests, this works exactly the same way as with unit tests, because the target setup is the same.
One thing maybe worth mentioning is that I make very little use of mocking in my tests. I simply dislike the idea of adding code that “does nothing”, there only to satisfy some dependency, and it seems it’s not necessary for most of my code. Maybe think about embracing integration tests more if you find yourself producing a lot of mock code.
Anyway, let’s come to
UI Tests
The idea for the UI tests is to have a suite of common use cases, or scenarios, and verify the app’s correct behavior for each of these scenarios by means of an automated test. The use cases should be simple to write and maintain, just like the previous examples of unit and integration tests.
How to best approach this?
Xcode UI Testing
Xcode comes with a UI testing framework that builds on
- the same XCTest framework we use for unit tests,
- and Apple’s Accessibility APIs.
And here’s the problem already: the Accessibility APIs have been designed for a different purpose, not for writing UI tests. Accessibility clients can interact with an app through these APIs in certain ways, but there’s no way to perform any checks on the internal state of the app after an interaction. Which, kind of, is the main point of any test.
There are certain types of scenarios, like filling out a registration form, where testing with Xcode UI tests is feasible, but the majority of functional tests will require more fine-grained ways of interacting with the app.
So, that makes Xcode’s UI testing framework mostly useless in my opinion. Moreover, Xcode UI tests are a pain to write (there’s a recorder, but the code it produces is a mess anyway) and very hard to read and maintain, even with plenty of comments.
So after playing around with Xcode UI testing briefly, I decided that this was not the way to go.
XCTests with a Host Application
What I found much more practical is to use XCTest’s capabilities to use the actual app itself, rather than xctest,
to act as the host application for the unit test bundle. This lets you drive the entire app from your tests,
which now look just like regular unit or integration tests.
So, how do we set this up?
For the unit and integration test targets, no host application is selected:

This configuration will use xctest as the host application for the test bundle, as discussed previously.
The UI test target, however, uses the app as the host application for the tests bundle:
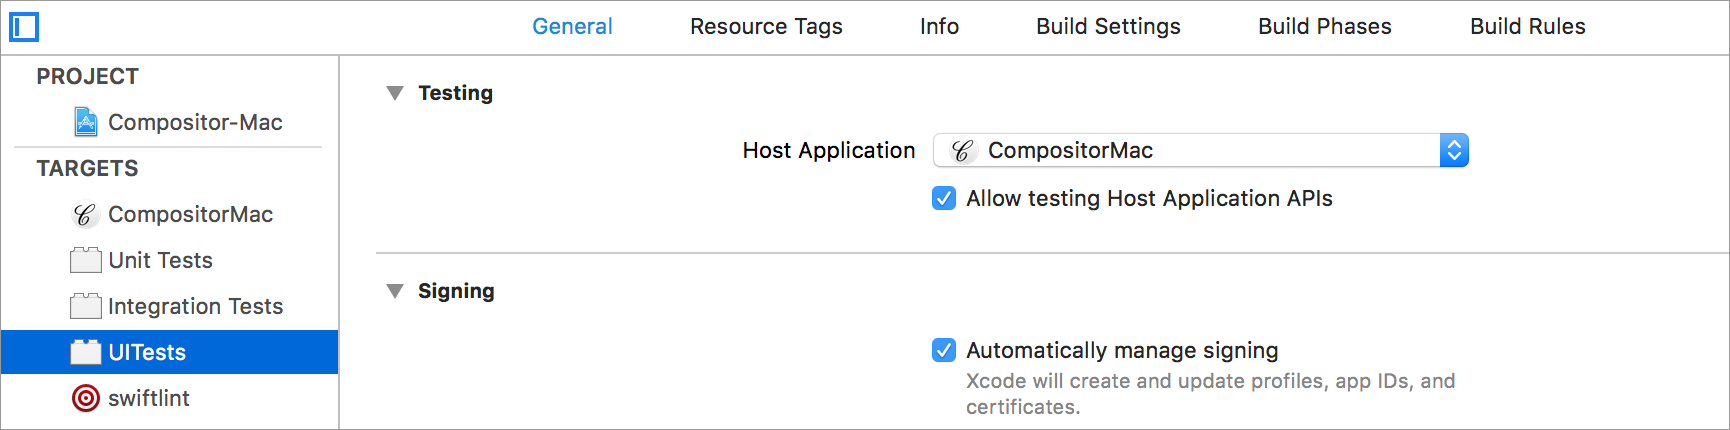
This dropdown corresponds to the TEST_HOST build setting:
TEST_HOSTPath to the executable into which a bundle of tests is injected. Only specify this setting if testing an application or other executable.
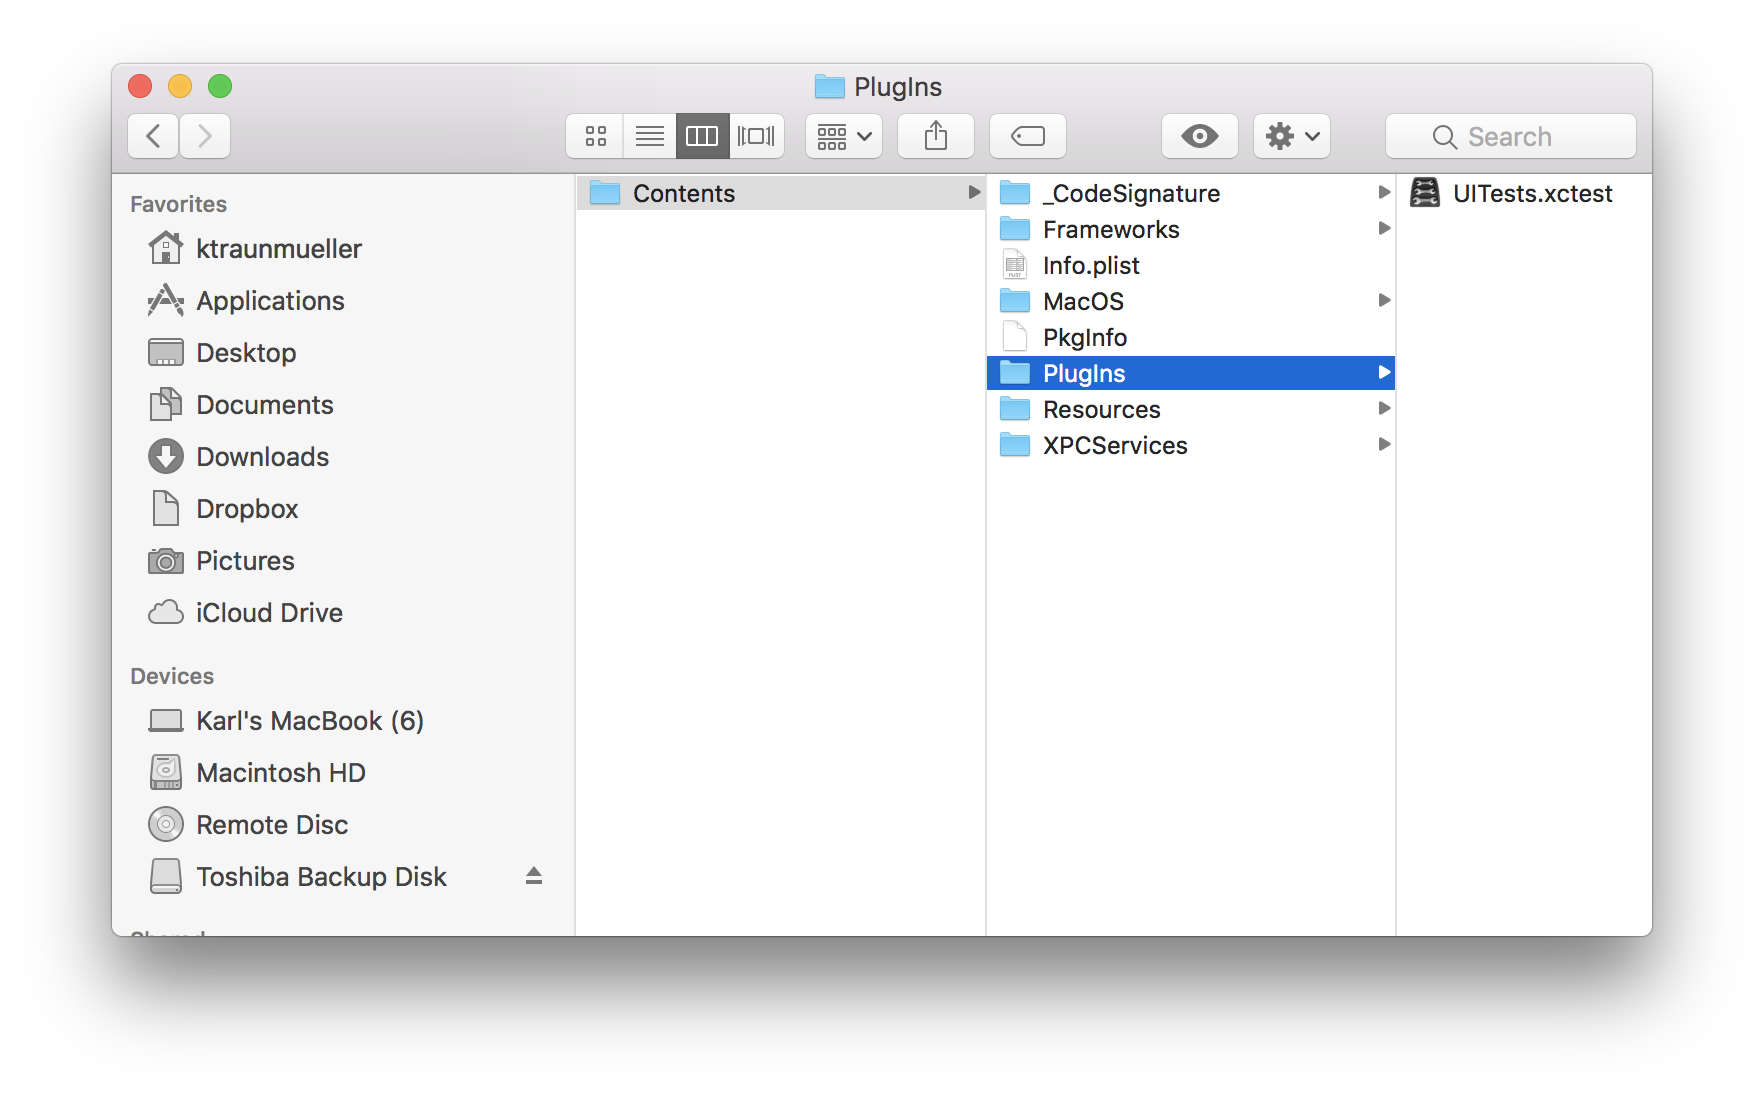
With this setup, the test bundle is now a plug-in to the app (the screenshot shows the app bundle content):
Also, note that the “Allow testing Host Application APIs” check box is checked. This makes the
app bundle’s internal types visible to the test bundle, as long as the tests contain a
@testable import Compositor
statement.
Allright, let’s have a look at a
UI Test Example
Here’s the basic setup, together with an example UI test:
//
//  UITests.swift
//  UITests
//
//  Created by Karl Traunmüller on 22.09.18.
//  Copyright © 2018 microLARGE. All rights reserved.
//

import XCTest
import CoreGraphics

@testable import Compositor

final class TestHarness {
    let windowController: DocumentWindowController
    let window: NSWindow
    let dviViewController: DVIDocumentViewController
    let dviView: DVIDocumentView
    let documentModel: DocumentModel

    init(windowController: DocumentWindowController,
         window: NSWindow,
         dviViewController: DVIDocumentViewController,
         dviView: DVIDocumentView,
         documentModel: DocumentModel) {
        self.windowController = windowController
        self.window = window
        self.dviViewController = dviViewController
        self.dviView = dviView
        self.documentModel = documentModel
    }
}

class UITests: XCTestCase {

    private func openDocument(_ basename: String) -> TestHarness? {
        guard let (url, _) = loadSampleSource(basename) else {
            return nil
        }
        let document = Document()
        do {
            try document.read(from: url, ofType: "tex")
        } catch let error {
            print("\(error)")
            return nil
        }
        document.makeWindowControllers()
        document.showWindows()
        pumpRunLoop()

        guard let windowController = document.windowControllers.first as? DocumentWindowController,
            let window = windowController.window,
            let dviViewController = windowController.splitViewController?.dviViewController,
            let dviView = dviViewController.dviView,
            let documentModel = dviViewController.documentModel else {
                return nil
        }
        while documentModel.isTypesetting {
            pumpRunLoop()
        }
        return TestHarness(windowController: windowController,
                           window: window,
                           dviViewController: dviViewController,
                           dviView: dviView,
                           documentModel: documentModel)
    }

    private func delay(by seconds: TimeInterval = 1) {
        let exp = expectation(description: "delay")
        DispatchQueue.main.asyncAfter(deadline: .now() + seconds) {
            exp.fulfill()
        }
        wait(for: [exp], timeout: seconds + 0.5)
    }

    func test_is_editing_after_click() {
        guard let harness = openDocument("waveletintro") else {
            return XCTFail()
        }

        harness.window.setFrame(testWindowFrame, display: true)
        harness.dviView.scrollView.magnification = 1.5
        harness.dviView.scrollView.contentView.bounds = (NSRect(x: 150.666666666667, y: 140.0, width: 618.666666666667, height: 541.333333333333))

        guard let textView = harness.dviView.selectedTextView else {
            return XCTFail("expected a selected page")
        }
        textView.mouseDown(with: Event(locationInWindow: NSPoint(x: 424.19921875, y: 562.1328125)))

        XCTAssert(textView.isEditing)
        XCTAssert(textView.caretBlinking)
        XCTAssertNotNil(textView.caretBounds)
        XCTAssertNil(textView.endOfParagraphMarkerLocation)
        XCTAssertNil(textView.blankIndicatorLocation)

        guard let selection = textView.selection else {
            return XCTFail("expected a selection")
        }
        XCTAssert(selection.sourceRange == NSRange(location: 1328, length: 0))

        delay()
        harness.window.close()
    }
The openDocument() method is a utility method to reduce clutter in tests. It opens a given
LaTeX document, waits until typesetting is finished, and returns a set of references to objects
inside the document window.
The pumpRunLoop() function is a utility function that makes sure any pending events in the test’s
run loop are processed:
func pumpRunLoop(numberOfTimes: Int = 1) {
    for _ in 0 ..< numberOfTimes {
        RunLoop.current.run(until: Date())
    }
}
Notice how the test_is_editing_after_click() UI test looks exactly like a unit or integration test.
After bringing the testee into a defined state (i.e., moving the document window to a defined
location and scrolling and zooming the page to a defined position and magnification),
a mouseDown() event on the text view is simulated, after which the state of the text view
is asserted upon.
Here’s a video showing some of these tests in action. For the sake of demonstration, I added a small delay at the end of each test, so that you can actually see the state of the UI at the end of the test:
Dedicated UI Test API
To facilitate writing tests in this style, I added some dedicated testing functionality to the app code. This testing functionality comes in two flavors:
Opening up Interfaces
For many things to test, interfaces are already in place, but need to be opened up a little – ususally
from private to internal read-only (private(set)) or internal (in case of methods):
private(set) var blankIndicatorLocation: CGPoint? // internal for testing
Test-Enablers
Second, I added additional “test-enablers” in a few places:
// MARK: Testability

@IBAction private func resetToTestWindowFrame(_ sender: Any?) {
    window?.setFrame(testWindowFrame, display: true)
}

@IBAction private func resetToTestState(_ sender: Any?) {
    guard let dviViewController = splitViewController?.dviViewController,
        let dviView = dviViewController.dviView else {
            return
    }
    dviView.scrollView.magnification = 1.5
    dviView.scrollView.contentView.bounds = (NSRect(x: 150.666666666667, y: 140.0, width: 618.666666666667, height: 541.333333333333))
}
This code can then be run from a Debug-build only menu:
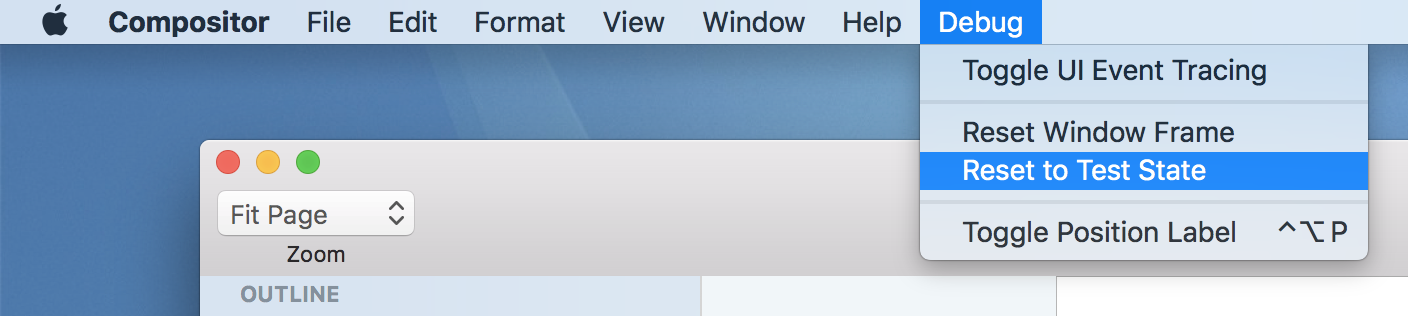
This lets me quickly set the app to the exact same state as some test, and go from there.
So, my approach to UI testing is to add a dedicated testing API to the app, instead of bending a generic API (i.e., Accessibility) to the task.
With a setup like this, it’s simple and quick to write UI tests that are easy to read, understand, and maintain. The tests run fast, can be conveniently debugged, and the state of the app can be easily inspected.
Adding a DSL
If you’re working in a larger team, you may want to add a domain-specific language on top of that, so that Product Owners or Test Managers can write test scenarios in a language like Gherkin, which can then be run in an automated fashion.
Since Swift’s reflection APIs are very limited, an annotation-based approach similar to Cucumber (which makes use of Java’s excellent reflection capabilities) would probably not work, but a simple string-keyed, function-valued dictionary might be all it takes to associate executable code with DSL vocabulary. Add a simple DSL parser, and you should have a basic framework for executing these test scenarios.
That’s it, I hope you find this post useful!